Adapting a GPU Cooler to a CPU – Does It Work? Procedure and Tests
It’s nothing new to see people mounting CPU coolers onto graphics cards, especially those large tower models with multiple heatpipes. While they might turn your GPU into a bit of a bulky mess, they can significantly lower temperatures and squeeze out a bit more performance through overclocking.
But what about the reverse? A GPU cooler on a CPU? That’s exactly what we’re going to explore in this article!
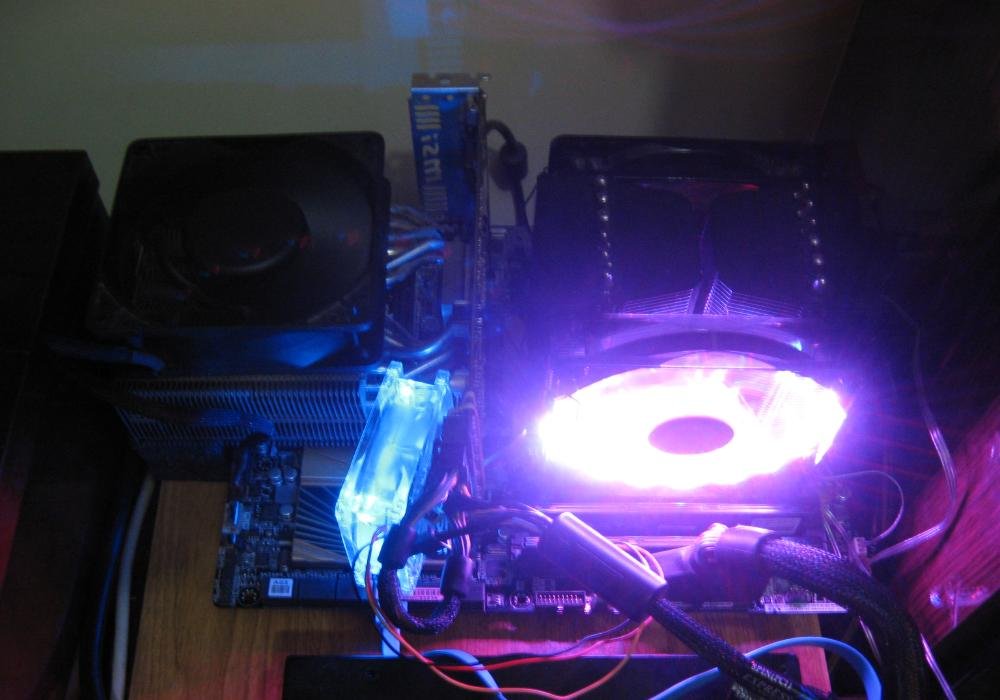
Heatsink Origin – A Trip Back to 2010!
With today’s larger modern GPUs, adapting CPU heatsinks onto them would be virtually impossible. However, in the past, things were different, and video cards were more compact and manageable in terms of cooling requirements.
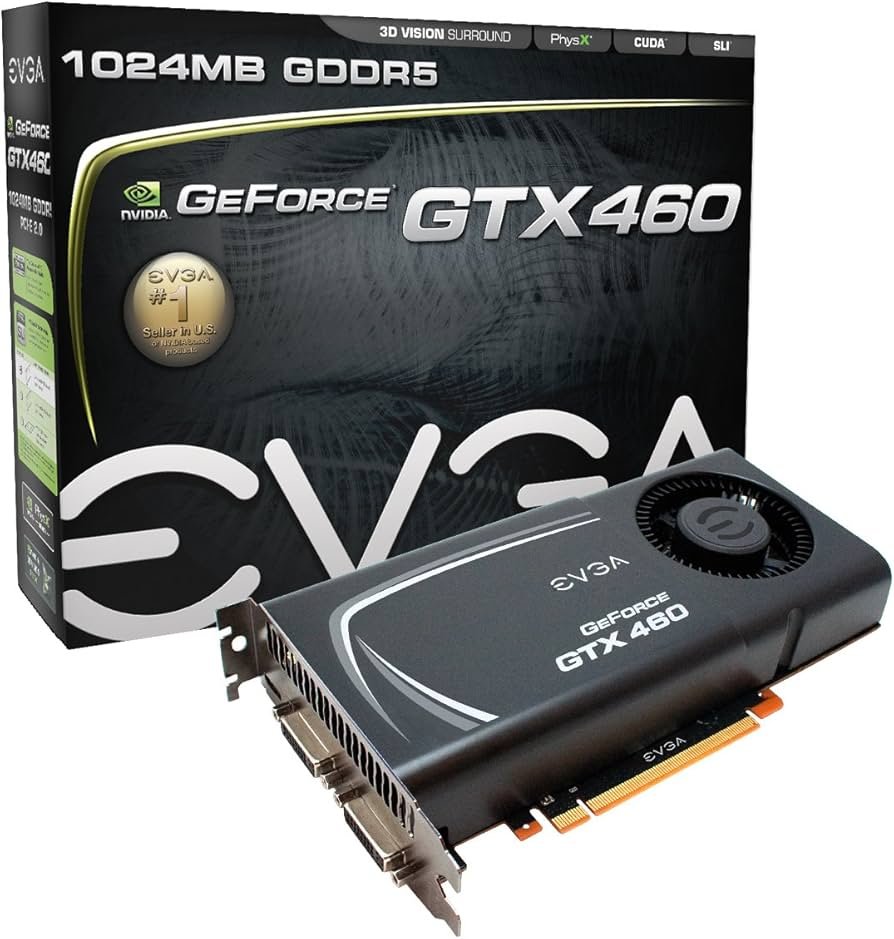
The test subject of this article is an EVGA GTX460, specifically the blower model shown below, which needed to efficiently dissipate 160W of GPU TDP for the GF104 chip. In comparison, that’s equivalent to the cooling demands of a modern RTX 4060 TI.
Since it’s a dual-slot blower model, the heatsink tends to have a relatively low profile because it’s designed to work with radial airflow. This can be advantageous for compact systems (SFF), allowing the use of smaller cases.
Adapters – Here comes the magic of 3D printing!
Of course, making this kind of adaptation isn’t exactly straightforward. One of the main challenges is figuring out how to mount the heatsink onto the motherboard, since the screw holes don’t match up.
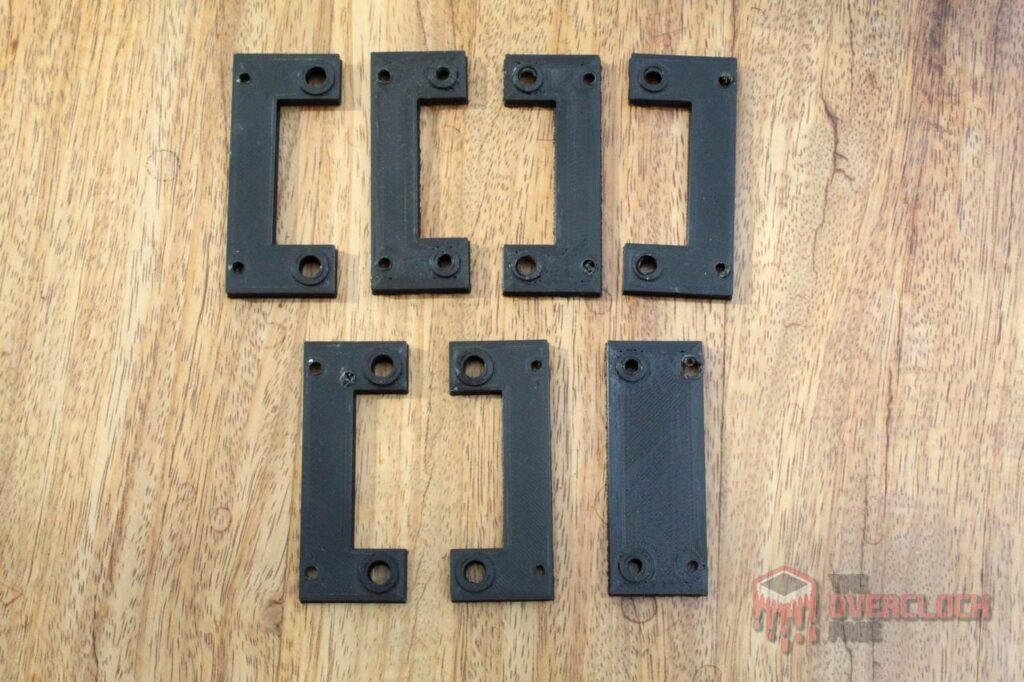
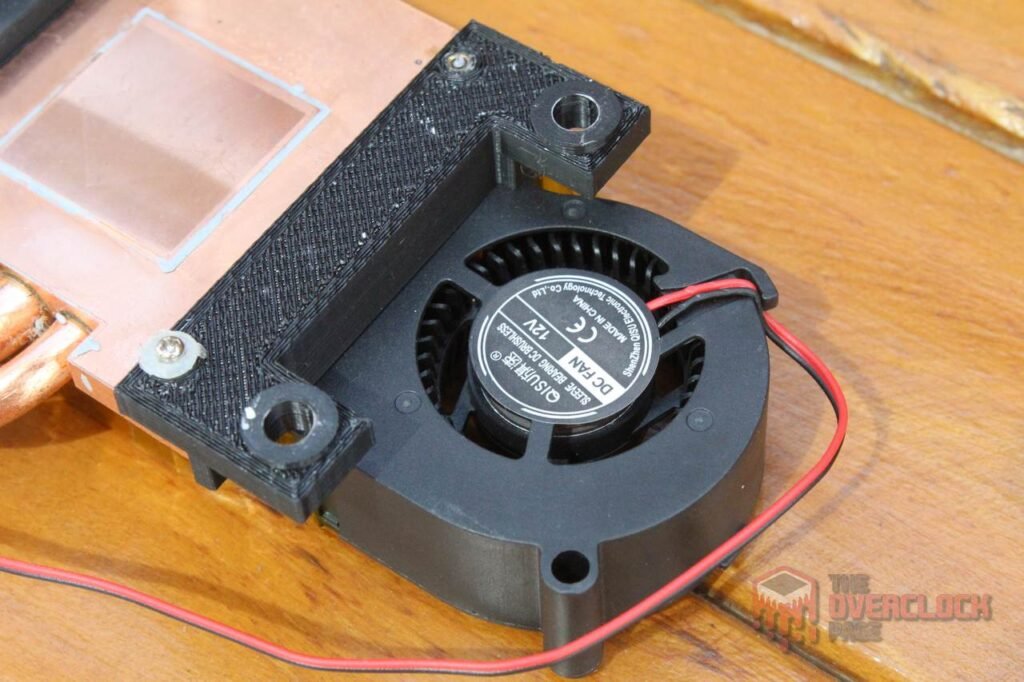
To solve this, we once again turned to 3D printing, designing custom brackets that attach to the cooler’s original mounting “towers” and extend them to align with the AM4/AM5 socket holes. We used ABS filament for the job, thanks to its superior mechanical strength and heat resistance.
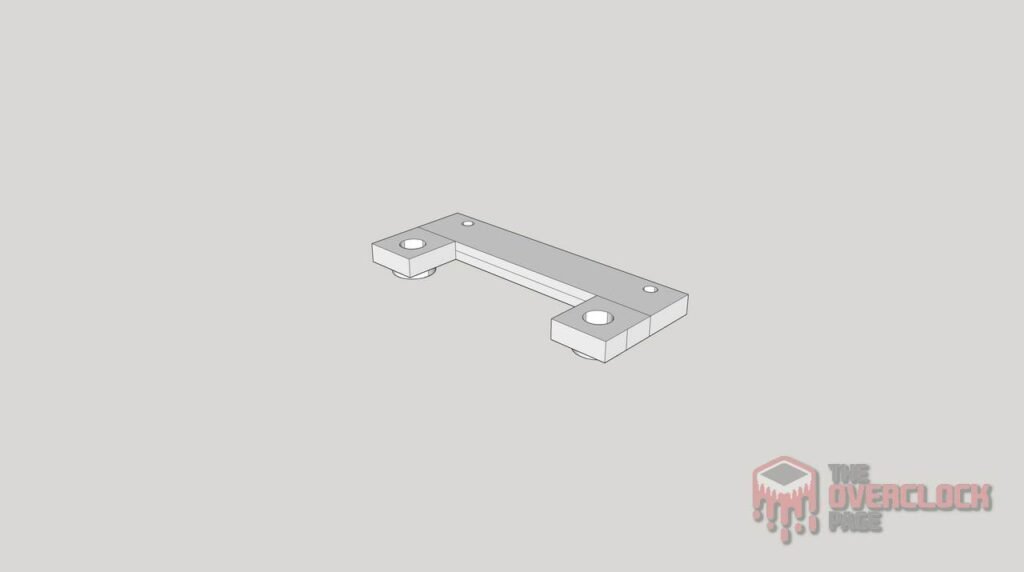
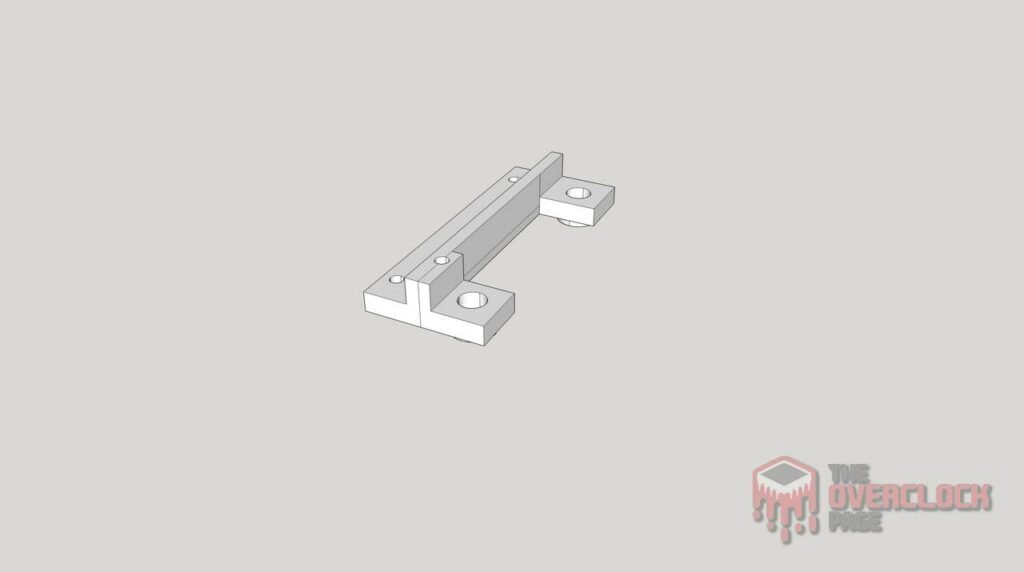
We got a bit lucky, the heatsink dimensions turned out to be just right for the available space around the CPU socket, and the original mounting towers happened to line up with the AM4 hole spacing. However, one major challenge was getting the bracket height just right so the heatsink base would make proper contact with the CPU’s IHS. It took at least five design revisions before we finally nailed the perfect fit!
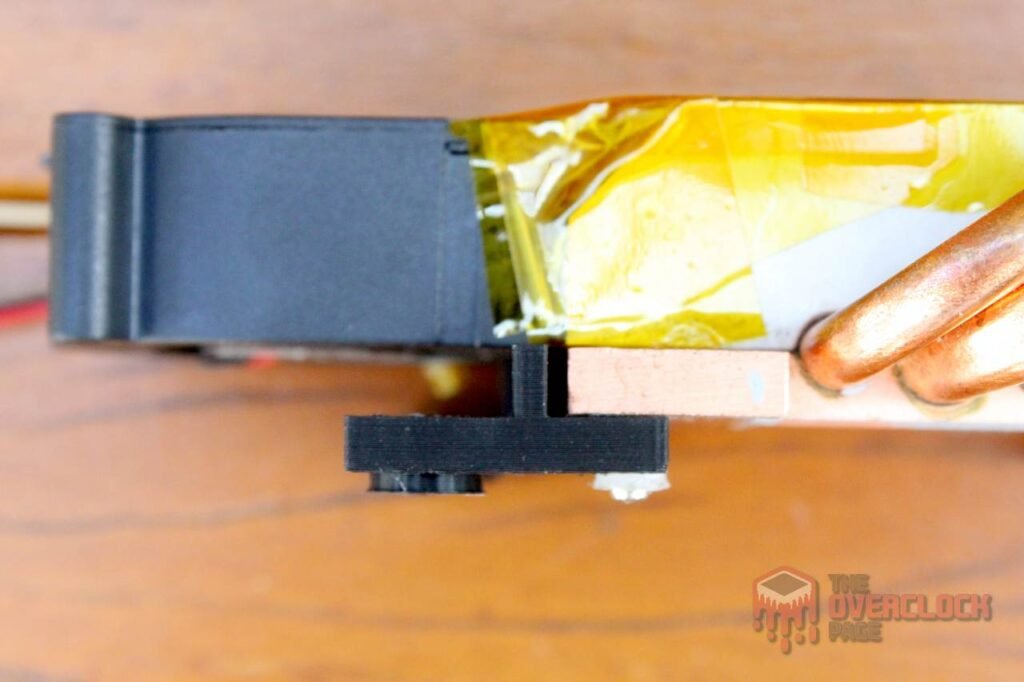
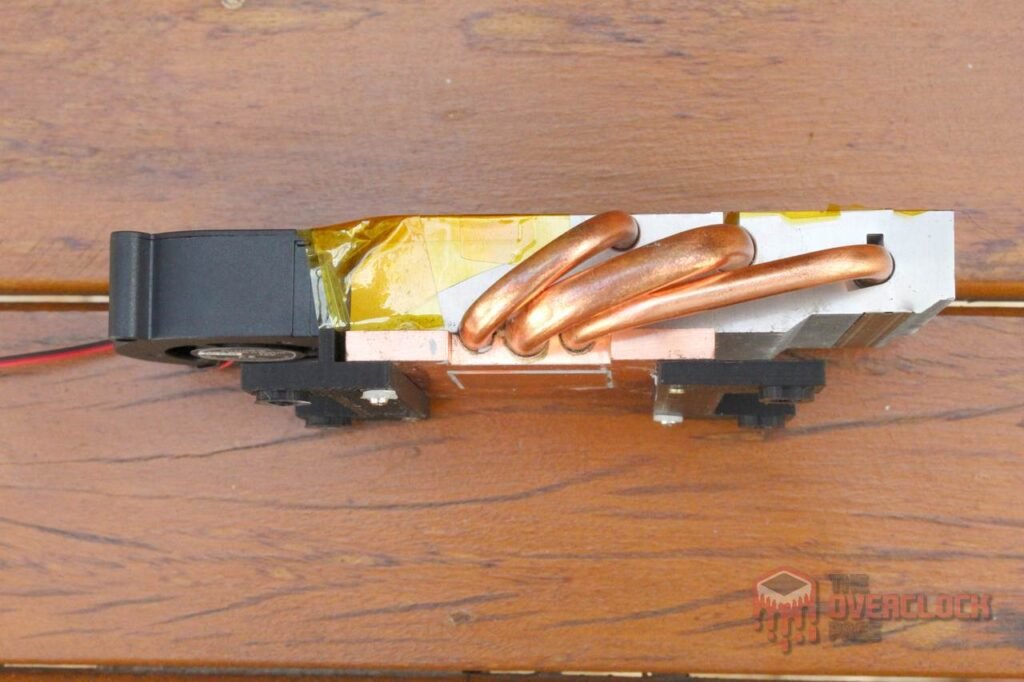
An interesting detail: the bracket on one side is slightly longer than the other. Combined with the “step” required to mount the blower, this results in two distinct parts.
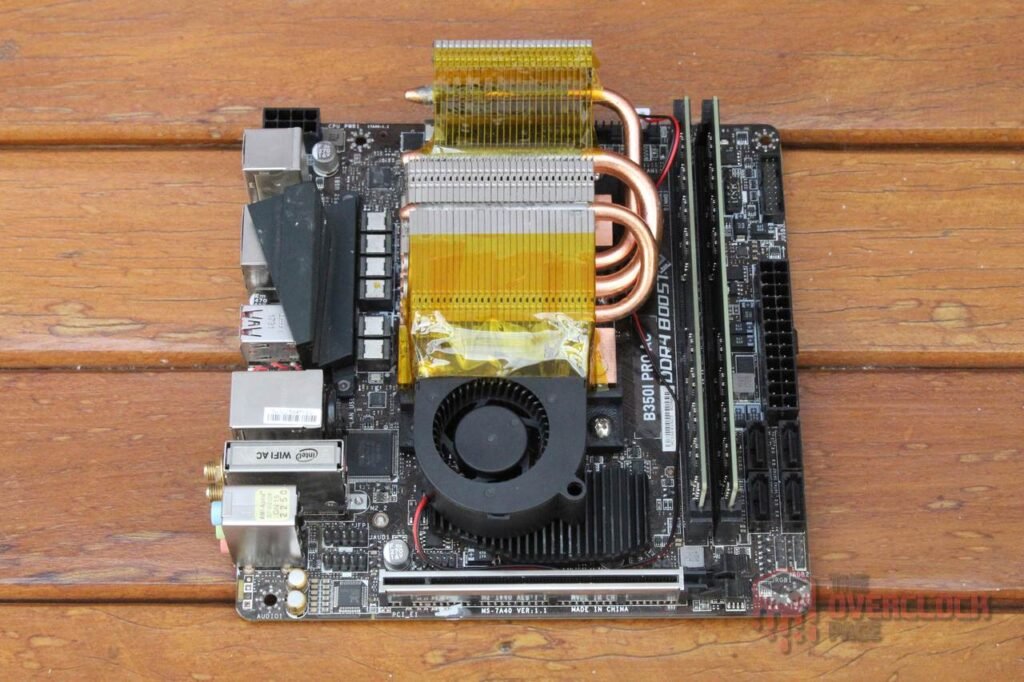
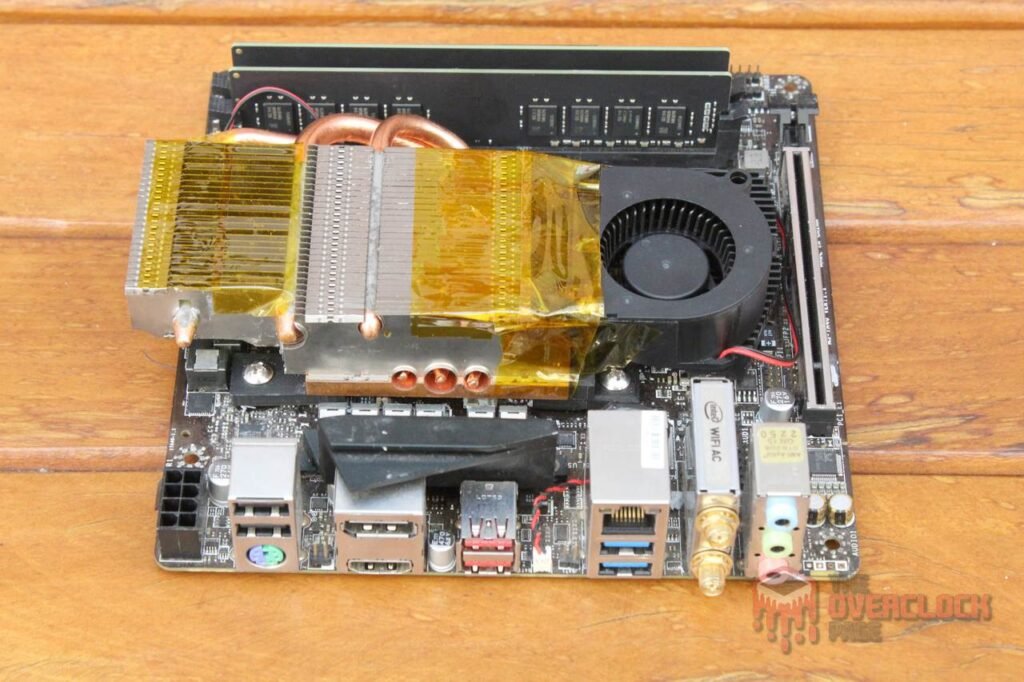
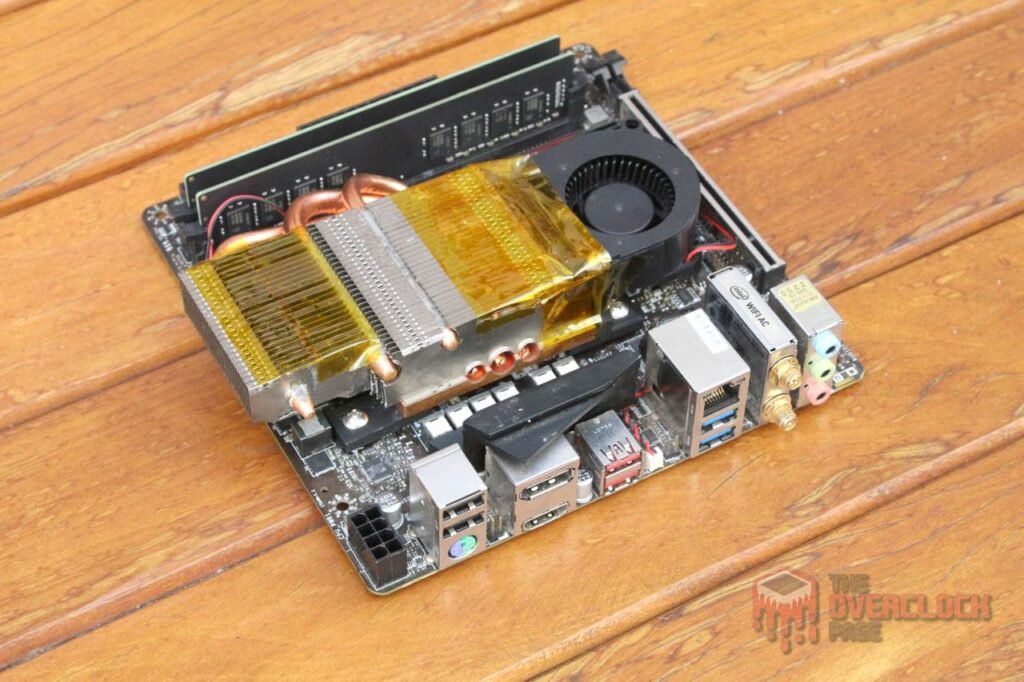
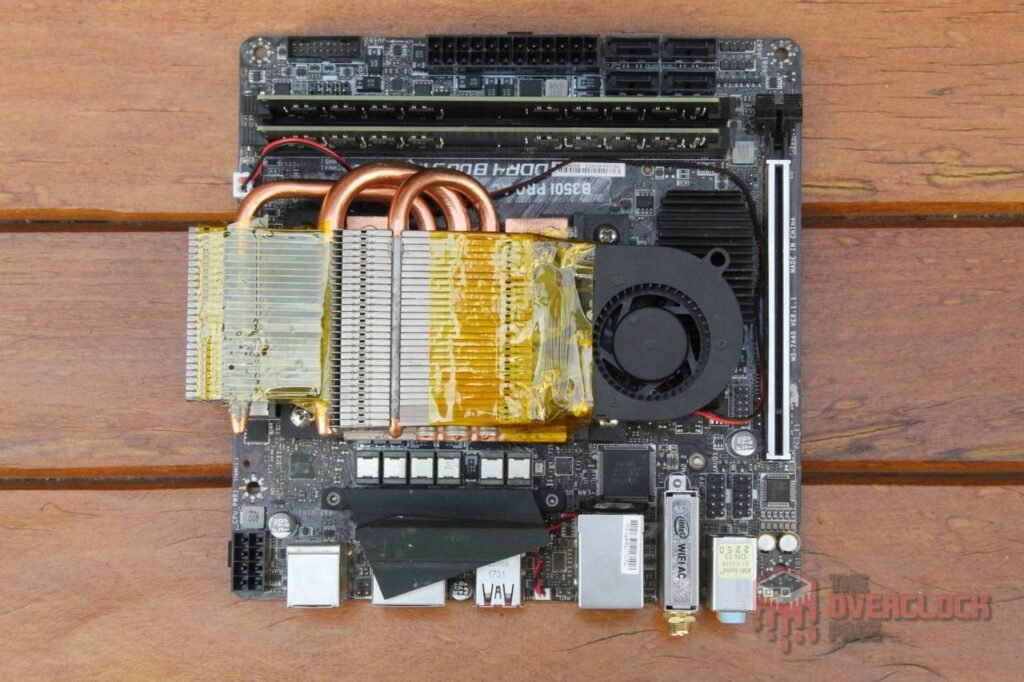
Here’s the final result, with the blower installed and custom “tunnels” made from Kapton tape to force airflow through the heatsink fins. It’s worth noting that this blower isn’t the original one from the GTX 460, instead, we used a Chinese 5020 model, which is the largest size that fits without interfering with nearby motherboard components.

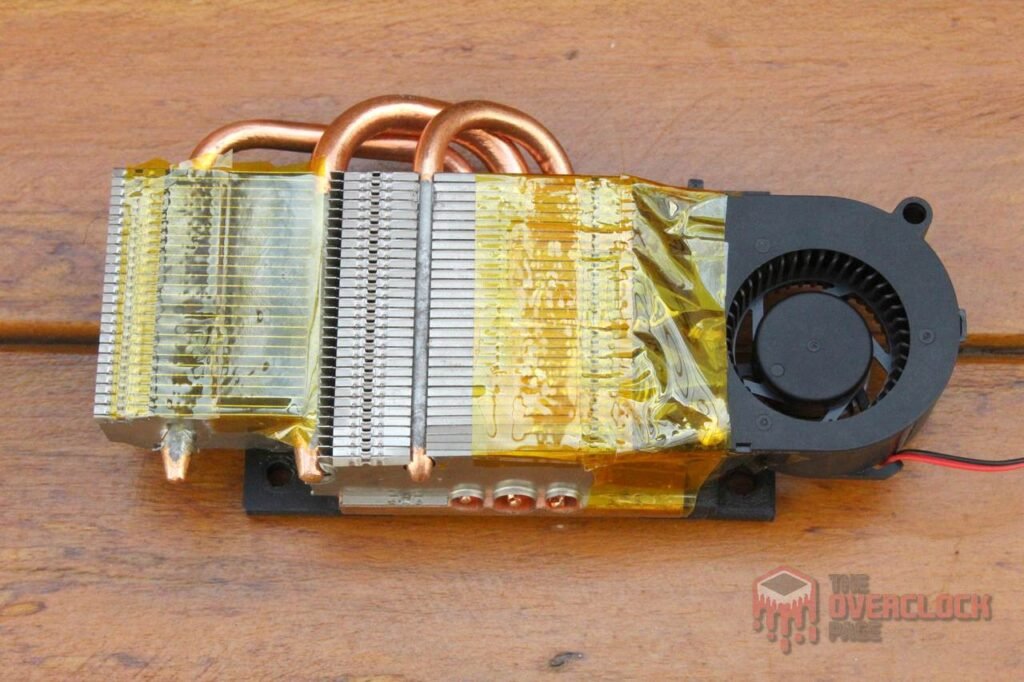
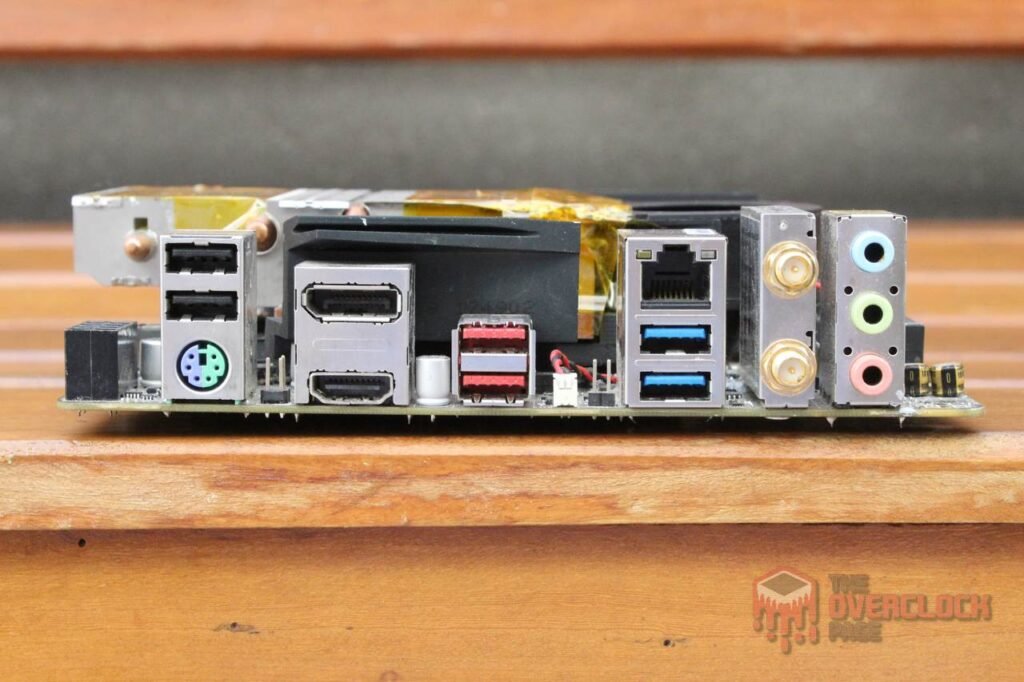
The cooler ended up with a total height of just 28mm, making it extremely compact and likely suitable even for the smallest PC cases.
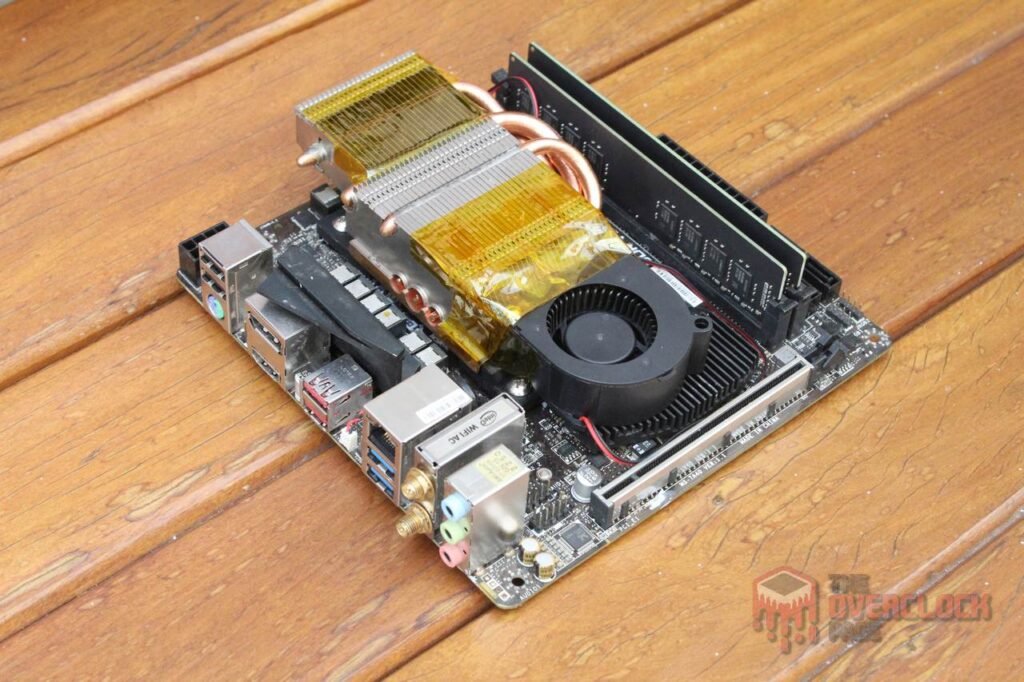
And finally, the heatsink fully installed on the motherboard. The result has a rugged, industrial look, almost like something built for embedded systems, and it fits the MSI B350I PRO AC like a glove! ?
Hardware Used:
CPU: AMD Ryzen 5 5600X
MOBO: MSI B350I Pro AC
RAM: 2x16GB Asgard Freyr T3 3600CL14
GPU: Galax GTX 1650 Super
PSU: Seasonic SS-750AM
COOLER: EVGA GTX 460 heatsink modified with a Chinese 5020 blower
SSD: Kingspec 240GB
Test Objectives:
The goal is to test whether the modified GTX 460 heatsink can effectively cool a modern CPU, determine its maximum performance limit, and evaluate its noise level. More details about the tests can be found in the following paragraphs.
Noise levels
To measure the noise, the UNI-T UT353 sound meter was placed about 100 cm away from the test bench, with all other fans (except for the blower and PSU) turned off. The goal here is to capture only the noise from the specific item being tested.
The unit of measurement used is decibels (dB), which follows a logarithmic scale. Practically, this means the volume doubles in intensity with every 3 dB increase. So, doubling 50 dB doesn’t result in 100 dB, but rather 53 dB. However, the human ear perceives a doubling of volume with a greater difference, typically between 8 dBA and 10 dBA. For reference, a quiet environment like a library typically has a noise level around 30 dBA.

With the fans running at their maximum speed, our cooler proved to be quite noisy, reaching nearly 50 dBA, which was uncomfortable and definitely audible. However, after adjusting the fan speed curve, we were able to reduce the noise to 45 dBA under load, which is a bit quieter than the Jiushark JFK13 we tested some time ago.
At idle, we managed to keep the blower running at a very low speed, making it extremely quiet, only slightly above the baseline noise level, which is the ambient noise with everything turned off.
Performance
For the performance tests, the cooler was mounted with GD-2 thermal paste, and the fan speed was set to 100% for these tests, which were also conducted in an open test bench.
The R5 5600X was used, with a standard TDP of 65W (PPT 88W, TDC 60A, EDC 90A), and to determine the cooler’s limit, a 75W configuration was tested (PPT 100W, TDC 70A, EDC 105A). The workload used was Cinebench R23 Multithread, running for 10 minutes.
The ambient temperature during the tests was 28°C for the 75W test and 27.3°C for the 65W test.
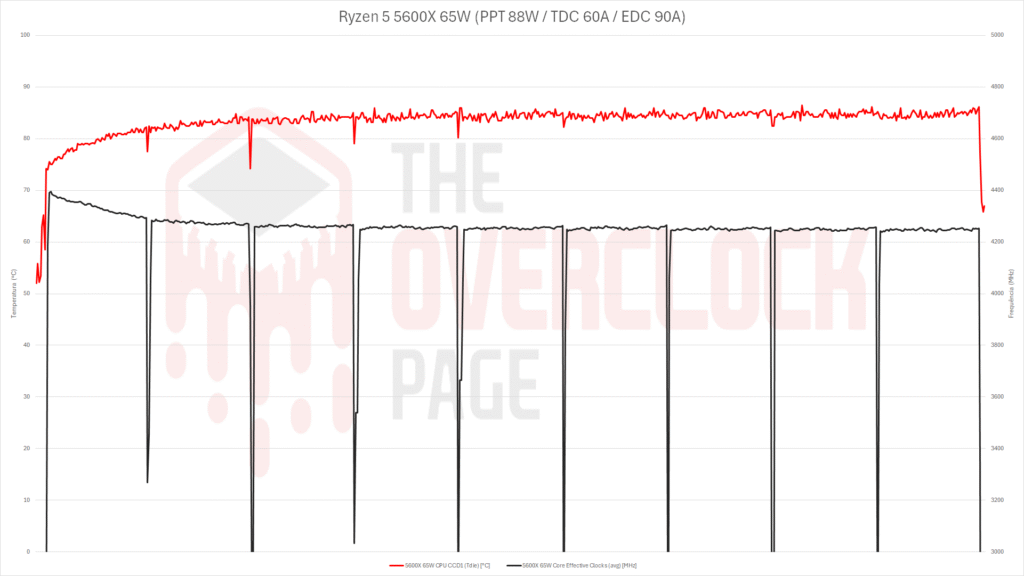
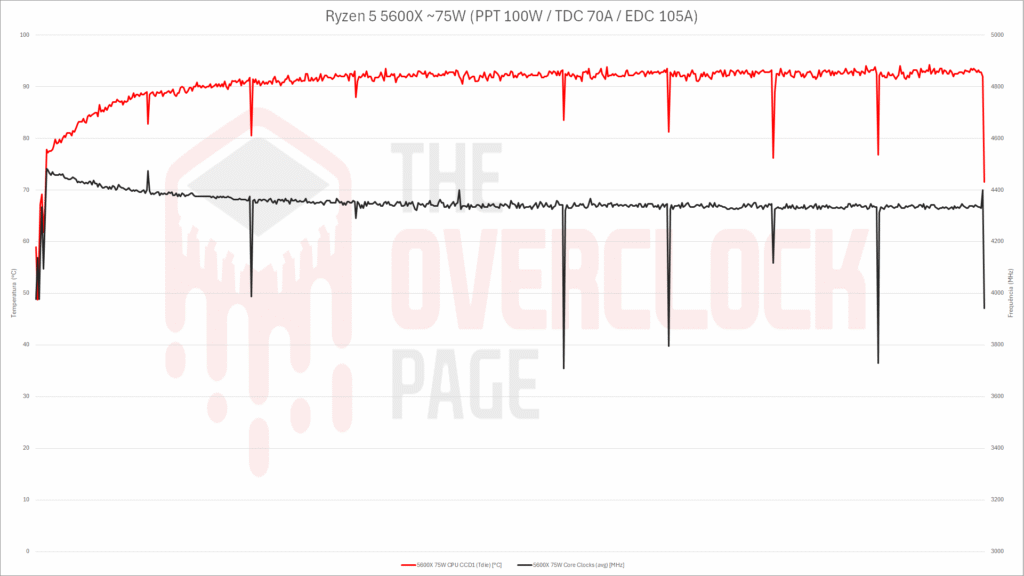
The limit for our GPU cooler turned out to be around 75W, with temperatures slightly below 95°C and frequencies just above 4.3 GHz. While it’s technically possible to say it can handle up to 75W, the noise level is at maximum, as there’s no thermal margin to reduce fan speed.
At 65W, the temperature hovered around 85°C, with frequency slightly below 4.3 GHz. This suggests there’s some thermal headroom to adjust the blower speed, which in turn helps reduce the noise level to the 45 dBA from the previous test.
The performance difference in Cinebench R23 Multithread was also minimal, with scores of 11257 and 10926 points at 75W and 65W, respectively.
Conclusion
Based on the tests and results presented, the following conclusions can be made:
Adapting the GPU heatsink for use on a CPU wasn’t too difficult, though this can vary greatly from case to case. In this instance, the heatsink already had the right shape and dimensions, so not many modifications were needed to make it work.
As for the mounting brackets, having access to a 3D printer is almost essential, as it greatly facilitates the manufacturing of parts. It’s also easier (and cheaper) if modifications are needed. It’s important to note that just having the printer isn’t enough, you’ll also need some familiarity with CAD software and measurement tools. Without this knowledge, you won’t get far, at least not if you go this route for bracket production.
Regarding noise levels, as expected from a blower-equipped system, our Frankenstein cooler is quite noisy at 100% fan speed. However, we were able to adjust the fan curve to make it almost silent at idle, and significantly reduce noise under load, depending on the thermal load.
In terms of performance, our cooler was able to handle a 5600X configured with a 75W TDP, though at the cost of very high noise levels and temperatures close to the 95°C limit. Therefore, it’s more comfortable to say that 65W is the maximum, with noise and temperature levels much more manageable.
In the end, this experiment can be considered a success, as there is a wide range of AM4 and AM5 CPUs with TDPs up to 65W. Due to its very low profile, this solution can even be used in the most compact ITX cases. Could this turn into an exotic SFF system? Stay tuned for the next chapters! 🙂

